Sponsor Links

The Amazing Shrinking Man!

Tuesday, November 16, 2010

Things to Give Thanks For

Whether you are Christian or not, this is the time of year here in the US where reflection on that which you are thankful for. Yep, Thanksgiving is coming up in the US, and its a lot more than feasting on Turkey and all the fixings. Its also a time of gathering of family.

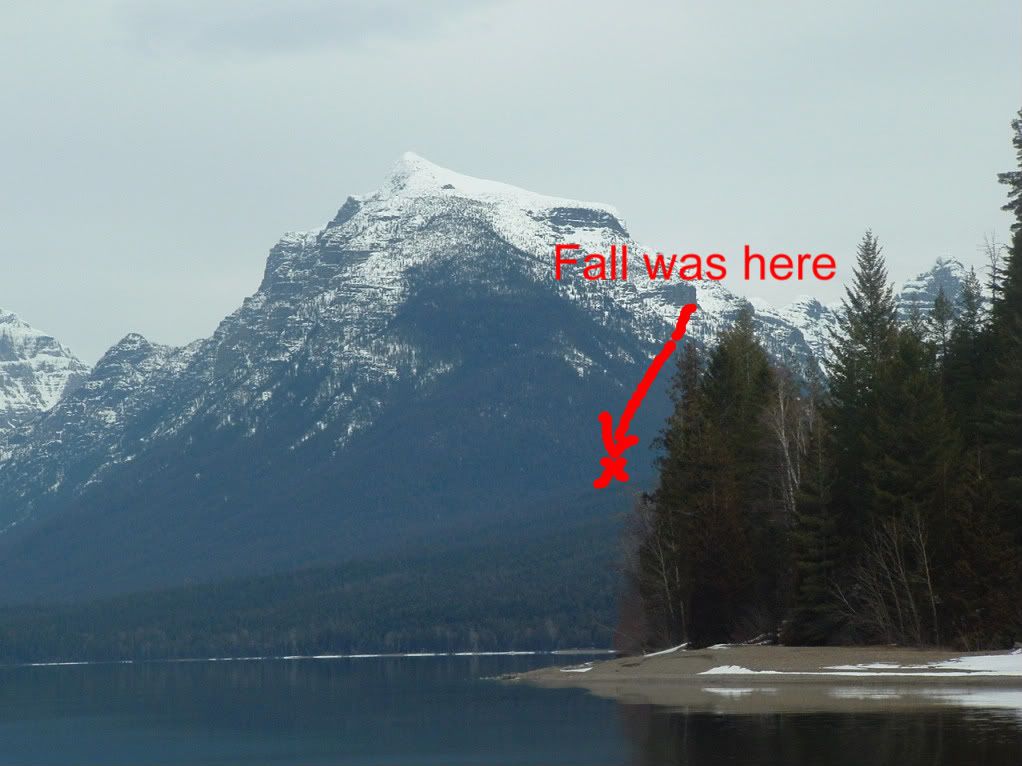
So, I have a list of things I'm thankful about this year, for sure. I survived the health issues Ive had this year. A heart issue, and to bouts of pneumonia, and a life threateningly severe reaction to an antibiotic and a Thyroid Cancer scare. Ive actually been off the bike most of the summer and fall.....it sucks, but at least Im here to whine about it.

On the good side, I'm off the coumadin from my Atrial Fibrillation incident. I havent gained any weight, even though my activity levels are abnormally low.

So, heres a quick look ahead, by the way, to what I'm planning to do for Thanksgiving as part of our share of the family gathering. I'm doing a Smoked Turkey in my Brinkmann Smoker Grill.

Photobucket

Photobucket

This is the recipe I use, from Brad Bolton.

STEP ONE:

smoked turkeyThe absolute first step in cooking a turkey on a smoker is to pick out a bird (turkey) that is not the biggest one you can find. The main reason for a smaller bird, 10 to 14 pound maximum, is the time limitations usually involved. It takes between 6 and 8 hours to smoke a 12 pound turkey and the bigger they get, the longer they take.


STEP TWO:

Set up the smoker and toss on the bird. When using charcoal, it is best to let the flames burn out, fill the water pan with water (seasoned water is fine too), then place the lid on the smoker and wait for the temperature to reach the 'safe' zone on your smoker. Once that is accomplished, toss the turkey on there gently and cover the smoker. Start timing the turkey when the temperature returns to the save zone.


Safety Reminder: Remember chickens and turkeys are prone to salmonella bacteria which can ruin your whole Thanksgiving. Cooking temperatures of 165 degrees F. minimum are essential for destroying this bacteria. This temperature is not the OUTSIDE of the turkey, but the inside, so keep that in mind when you decide on a larger bird. This of course is unless you happen to be feeding the traditional army at Thanksgiving.

More, includine tips and warnings here


Brad has a great recipe, there, and I do recommend highly that you go to the site for the tips.....its well worth the click.

Wednesday, July 07, 2010

250 mile 4th of July Road Trip: DIY Rack Worked Great!

Photobucket

Well, we went to the lake for the 4th of July Weekend, and the roof rack worked out great. We did get a lot of attention on the road, though. I guess the mark of a cycling fanatic is $3 Grand worth of bikes on a $1000 car.

Well, it was a great trip, and I did have a lot of fun. The weather was spectacular and I even got in some sailing.

Photobucket

Thursday, July 01, 2010

ANd the Rack is complete and Mounted!

And here it is, all finished and ready for our trip tomorrow morning for the 4th.

Photobucket

I love the way the Mahogany Stain finish came out. It looks great!

Here is how I have it secured to the load bars

Photobucket

I used dual steel shackle bolts at all 4 corners where it contacts the load bars.

Photobucket

All in all, it's come out a lot nicer than I expected, and about $700 less than a factory made recumbent trike roof rack.

Friday, June 04, 2010

DIY Roof Rack for My Wife's Recumbent Trike (Less than $50.00 so far!)

If you've ever priced out a rack for a recumbent trike, you're in for some serious sticker shock. They cost several hundred dollars, so, I undertook a small project. I made one.

Materials:
a set of Universal Roof Load Bars (Highland Brand)
2 12' long 2X4's
24 Decking screws, 3" length.
4 Shackle Bolts
4 heavy eye screws for lashing points to retain the trike
2 ratchet straps

It took me a short time to cut and assemble the frame.

Cut the first 2X4 into 2 72" stringers
Cut the second into 2 30" crossmembers and 2 33" crossmembers.
Cut the remainder of the second 2X4 in half for the front wheel guides. You will use exactly 24 linear feet of 2X4 for this rack.

Make a box frame with the 72" and 30" boards, with the 30" in an inside butt joint. Use 2 scews/joint.

Set the front lower crossmember centered on 8" from the inside edge of the front crossmember on the bottom of the frame using a 2x4x33" board. Use 4 screws to secure it. Now you set the wheel guides. Find the center and the inside edge of each wheel guide will be 1 1/4 inches from the center of the lower crossmember (See photos) This will serve as the front wheel platform.

Photobucket

Photobucket

Set the rear lower crossmember (The other 2x4x33" Board) centered on the rear crossmember at 10" from the inside edge of the box frame. Use 4 screws to secure it. This will serve as the rear wheels support platform.

Photobucket

Photobucket

I still need to get the necessary hardware to put the rack on the load bars securely, but that cost will be nominal. I will be using shackle bolts to secure the trike rack to the bars. Since a Sun EZ 3 is tail heavy, you place the rear lower crossmember against the rear load bar to get even weight distribution, as well as a bit more stability front to rear.

Photobucket

Photobucket

Photobucket

Remaining hardware needed:

4 heavy eye screws to serve as tiedowns for the trike, in the rack, and the shackle bolts to secure the rack to the load bars. I will be using ratchet straps to secure the trike in the rack. I'll be sealing and finishing the wood with Minwax Red mahogany stain, by the way. This will help preserve the wood and make for some really beautiful highlighting of the wood grain as well. I'll post the final pictures in later when I have it finished up completely.

And here are the pictures as I apply the finish. I went with Minwax Bombay Mahogany Outdoor Stain/Polyurethane gloss. (Cost @ Walmart: $10.71/Qt)

Photobucket

Photobucket

Monday, April 26, 2010

Cardiac Rehabilitation

Well, here it is, just over two weeks since I was hospitalized in Atrial Fibrillation with an irregular heartbeat, and I'm regulated and back in a normal sinus rhythm. I dad to be cardioverted (This is a synchronized electric shock through the chest...I was sedated for it, happily). Cardioversion is the normal treatment to restore normal sinus rhythm from fibrillation.

I'm also on many heart drugs now, as well as warfarin, and will be the rest of my life, presuming no adverse effects from the warfarin. Seems off to be taking rat poison therapeutically. It's to keep me from throwing a clot and having a stroke, though......a big risk if you are prone to atrial fibrillation or have an irregular heartbeat.

So, so far, the rehab is a few minutes a day on the bike on a trainer stand, spinning easy and never letting the heart rate go over 100BPM. I wish I could get out and go for a long ride, but the ticker just ain't ready for it yet. I fatigue too easily, and if I get the HR too high, or get too dehydrated, I'll be right back where I was with the resting heart rate cycling from 165-225 BPM, and hthe cardiac EV back down in the 20% range again.

Well, at least I didn't die..................

Tuesday, March 23, 2010

Well, we're home now. Highlights of the trip to Glacier National Park

OK, to start things off, we stayed in Whitefish, at the Super 8. They gave us great service and an inexpensive, comfortable room. The weather was warm, and unfortunately all the snow melted and left the trails and slopes a sheet of ice.

One of the results of this was my wife taking a nasty fall. Her crampon broke loose on some rotten ice on the trail and she took a 20 foot fall, cartwheeling down a near vertical slope....on St Paddies Day, no less. The luck of the Irish did protect her, though. She came out of it with a massive body bruise, rather than broken bones. This happened on Brown's Peak.


Here are some highlights of Glacier


I'm headed back out this Summer for some backpacking out in Glacier, spending a week or two tramping around, that's for sure!

Saturday, February 13, 2010

Planning Spring Break: Back Country Snowshoeing and Montana


Cutbank Valley
Photo courtesy of the National Park Service
Iceberg Lake
Photo courtesy of the National Park Service
Glacier National Park Multimedia Site

Well, as y'all saw from my last post, I've gotten into a new sport, to me......snowshoeing. We're planning a Spring Break trip to Glacier National Park for some back country snowshoeing. I'm starting a series of posts here to organize for the trip.

Our Equipment List:

  1. 2 65 Liter backpacks
  2. 100 feet of rope each
  3. Snowshoes and Poles (Cabella's Snowy Range Shoes, made by Atlas)
  4. Nautica Wind Shells, waterproof
  5. Polarguard vests under, packable
  6. Fleeces
  7. Fleece long underwear and foundation layer
  8. Waterproof wind pants
  9. Goretex Gloves
  10. 3 pairs wool socks, each in the packs
  11. Packcloth waterproof gaiters, tall
  12. Cabella's Sorrel Packer boots for me, or Herman Survivors as an alternate. My wife has some lighter weight packer boots with Thinsulate and a goretex inner boot.
  13. 2 Surveyors compasses
  14. Set of waterproof Topo maps of Glacier each
  15. Avalanche beacon each.
  16. GMRS Radios
  17. We'll rent the snowshovels from Glacier Outdoor Center and I don't think we'll really need ice axes, since we aren't really going to be doing any traverses on steep glacier faces and we can't carry ice axes on Amtrak, anyway.
  18. 2 1 liter Nalgene Bottles each for water
  19. Small backpackers stove, and fuel, to melt snow if we run short on liquids as well as 2 lighters and waterproof matches
  20. Small thermos for hot chocolate at the Overlook looking down on Lake McDonald from the mountaintop. (Good photo opportunity)
  21. Survival bivvy sacks if we get caught out in the back country in a Spring Storm + 3 days food. If we get caught in a bad one, we'll just dig in in a snow cave and ride it out.
  22. Glacier sunglasses for the wife and sunscreen for both. I have some very good polarized cycling/ski glasses, already
  23. Flashlights and survival whistles
  24. Back Country First Aid Kit
We'll also be carrying food, and if anyone has suggestions that I've missed, let me know!

Here's a bit of our planned terrain: This is about 15 miles out in the park.
http://www.gmap-pedometer.com/?r=3473659

My Video Archive

Our Clydesdale and Athena Cyclists

Search Resources

Google
 

Digix Consulting's Cranky T's

Powered By Blogger

Cardinal Greenway

Cardinal Greenway
What a day to ride!

Tools and associated sites of Mine

Labels