Materials:
a set of Universal Roof Load Bars (Highland Brand)
2 12' long 2X4's
24 Decking screws, 3" length.
4 Shackle Bolts
4 heavy eye screws for lashing points to retain the trike
2 ratchet straps
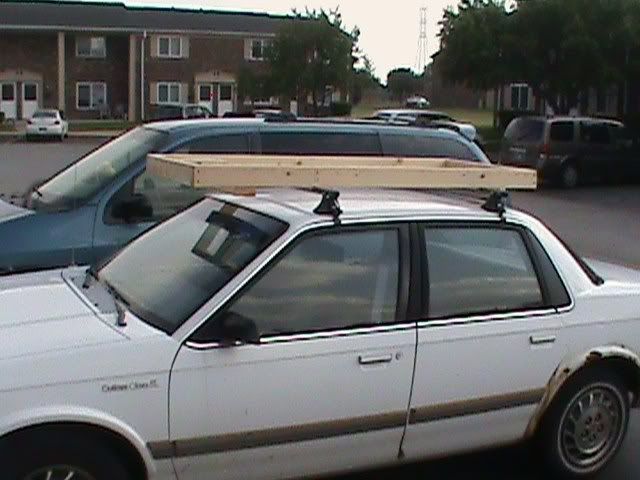
It took me a short time to cut and assemble the frame.
Cut the first 2X4 into 2 72" stringers
Cut the second into 2 30" crossmembers and 2 33" crossmembers.
Cut the remainder of the second 2X4 in half for the front wheel guides. You will use exactly 24 linear feet of 2X4 for this rack.
Make a box frame with the 72" and 30" boards, with the 30" in an inside butt joint. Use 2 scews/joint.
Set the front lower crossmember centered on 8" from the inside edge of the front crossmember on the bottom of the frame using a 2x4x33" board. Use 4 screws to secure it. Now you set the wheel guides. Find the center and the inside edge of each wheel guide will be 1 1/4 inches from the center of the lower crossmember (See photos) This will serve as the front wheel platform.


Set the rear lower crossmember (The other 2x4x33" Board) centered on the rear crossmember at 10" from the inside edge of the box frame. Use 4 screws to secure it. This will serve as the rear wheels support platform.


I still need to get the necessary hardware to put the rack on the load bars securely, but that cost will be nominal. I will be using shackle bolts to secure the trike rack to the bars. Since a Sun EZ 3 is tail heavy, you place the rear lower crossmember against the rear load bar to get even weight distribution, as well as a bit more stability front to rear.


Remaining hardware needed:
4 heavy eye screws to serve as tiedowns for the trike, in the rack, and the shackle bolts to secure the rack to the load bars. I will be using ratchet straps to secure the trike in the rack. I'll be sealing and finishing the wood with Minwax Red mahogany stain, by the way. This will help preserve the wood and make for some really beautiful highlighting of the wood grain as well. I'll post the final pictures in later when I have it finished up completely.
And here are the pictures as I apply the finish. I went with Minwax Bombay Mahogany Outdoor Stain/Polyurethane gloss. (Cost @ Walmart: $10.71/Qt)


